MONTREAL (GLOBE NEWSWIRE) — Toon Boom Animation has introduced Storyboard Pro 5.5, the latest release of its Emmy® award-winning software for storyboarding and animatics production. Storyboard Pro fits into any project’s creative and production processes for animation, CG, live action, or games cinematics. With new drawing and editing capabilities, and support for super crisp high pixel density displays, Storyboard Pro 5.5 offers the most complete set of storyboarding and animatics tools yet available. Storyboard artists work with directors to visually interpret TV, advert or film scripts.
“There really isn’t anything else like Storyboard Pro on the market,” explains Frank Summers, Animator at Sockeye Media. “Drawing, editing, and organizing panels is a breeze plus Storyboard Pro offers a host of exporting options to suit your production. “
What’s New in Storyboard Pro 5.5
New drawing tools – Guides and Vanishing Points work in conjunction with existing drawing tools to make perspective drawing easier. Scenes can now be mirrored in one click with the Flip Selected Scenes tool to facilitate storyboard revisions. Generate Auto-Matte makes it easier to shade characters on a background by automatically creating a matte from one or more drawings.
New editing capabilities – Storyboard artists and animatics editors can now set visual cues in the Storyboard Pro’s timeline for story and audio events. Timeline Markers remain in place even as panels are reordered, providing reliable visual references for progressing the story and timing specific actions. Sound editing has been enhanced, and storyboards can be kept in sync between Storyboard Pro and Avid Media Composer using the AAF Interchange Format.
Support for high density pixel displays – The user interface for Storyboard Pro is more crisply defined on modern high pixel density displays. With Retina and HiDPI display support, artists avoid eyestrain and focus on what is most important – the artwork.
“With the release of Storyboard Pro 5.5 we forged ahead with our commitment to artist driven efficiency. We added some workflow gems that really improve the day-to-day experience of creating storyboards and animatics,” said Francisco Del Cueto, CTO at Toon Boom Animation.
Pricing and Availability
Storyboard Pro 5.5 software is available for Desktop Subscription or a Perpetual license. Free, full-featured trials of Storyboard Pro are available online. Details on pricing, upgrades and free trials of Storyboard Pro 5.5 can be found on the Toon Boom website.
About Toon Boom Animation
Toon Boom Animation’s award-winning software is the global standard for 2D animation and storyboarding. Toon Boom solutions provide everyone from enthusiasts to professionals with the artistic freedom to create in any style and efficiently publish anywhere. Customers include Bento Box Entertainment, Disney Television Animation, DreamWorks Animation, Fox Television Animation, Mercury Filmworks, Nelvana and The Spa Studios. Toon Boom technology is available in Japanese, Simplified Chinese and Spanish. For more information, visit: toonboom.com.
For more information (press only):
Toon Boom Animation Inc.
Desideria Mastriaco
dmastriaco@toonboom.com
Marketing and Communications Manager
+1 514 490 6497
It is a fact that very most individuals are unable to visualise a scene for a movie, TELEVISION commercial, training video, sales video, or any other kind of visual production merely from reading the script or a text. Why you need to spend on concept artist for your film project? One reason is concept artist skills is unique from other artist, they have unique ideas that never been existed before.
Present those very same individuals with a photo or picture of some sort and they will grasp the concept immediately. The old expression is that “a picture tells a thousand words” and for many people that holds true. Try, for instance to describe the appeal of a Red Admiral butterfly to someone in words by themselves. Unless your name happens to be Charles Dickens, William Shakespeare, or Colleen McCullough, you might discover it very hard attempting to get over to them exactly what it appears like. In truth, you may have a hard time aiming to visualise it for yourself as you try to explain it.
However, present those very same people with a picture or a painting of a Red Admiral and they will get the message instantly.
The Same With A Film Script
It is precisely the exact same with a movie script or a book that you wish to turn into a movie. It can be really hard to discuss to somebody how great your TVC or video is going to be when you only have words to discuss it. In numerous circumstances, they actually cannot “see” it.
What you require is a way of creating an image revealing your idea in a manner where it can immediately be understood by the person or persons to whom you are displaying it.
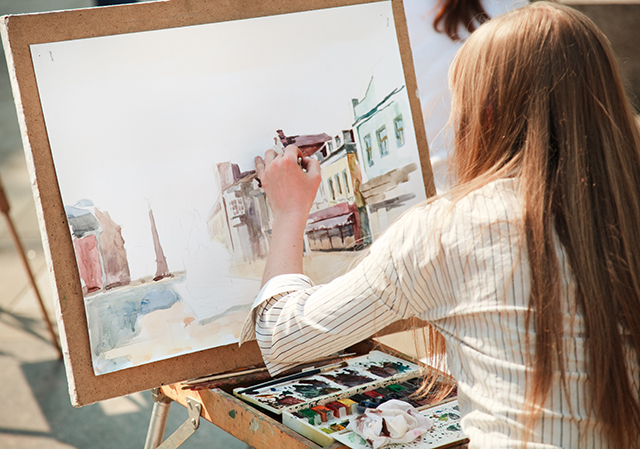
Enter the freelance storyboard artist. A storyboard artist is someone who has the capability to visualise the concept of a script or other piece of text and turn it into an image or series of images so that it can quickly be understood. In other words, he (or she) can see a picture in his mind’s eye and after that draw it so that anybody can comprehend what is going on in a scene.
An Additional Step
Some people believe that having actually a storyboard developed prior to starting production of a movie or TVC is just an additional action which includes higher cost to the total spending plan and actually isn’t a necessity. Nevertheless, this is far from the reality. Certainly, using a freelance storyboard artist includes a little extra expense, however the time and expense savings in the future can far surpass this.
Your storyboard will reveal each shot of the movie or video in the proper order and will have notes stating what is going on in the shot and describing any script that is being utilized in the scene. This makes it extremely simple to discuss to your prospective customer, your team, or certainly anybody else, how the video will proceed and what it is everything about. Many stakeholders discover it extremely tough to visualise something from a script, however your storyboard reveals them exactly how the video will play out.
It Will Help Considerably When It Comes To Production
Your storyboard will likewise assist considerably when it concerns production. In effect you have created a prepare for shooting your movie or video which consists of all of the various shots, the order in which they occur, and how the script will connect with them. It allows you to thinking your coverage– the numerous cam angles that you will use– and it likewise guarantees that you do not mistakenly leave any scenes out and need to go back to film them later: that of itself might conserve a significant amount of cash if you are filming on place. It will also save you time invested in revisions later if you don’t have a storyboard and something doesn’t quite exercise the manner in which you considered.
Some individuals will inform you that you can create a storyboard by yourself, however it is a lot much easier said than done, specifically if you are not great at drawing. It’s true that you don’t have to be a Picasso given that a bad illustration is better than no illustration, however nevertheless you have to illustrate each shot as properly as possible. You also require to include the script below each drawing with notes about what is going on in that specific shot.
Lots of people merely do not have the abilities to create their own storyboard, so it is far much better to utilize the services of a freelance storyboard artist such as Dean Mortensen who can visualise exactly what it is that you wish to say and then draw the shots properly for you.
Producing Storyboards For 30 Years
Dean Mortensen has been an art director of an ad agency for 30 years, and has been producing storyboards for all 30 of them. He has actually now left the marketing business and is working out on his own as a freelance storyboard artist. He has the unique capability to take a look at your script or text and then create a storyboard revealing each shot exactly as it must look, together with the accompanying notes and script. What’s more, due to the fact that he has been creating storyboards for extremely numerous years he can produce them really quickly when there are time constraints.
Dean has actually produced storyboards for the likes of Revlon, Y & R Group, Avis, Foxtel, Cuddly, Emirates, NSW Transport Maritime, Colgate, Tabcorp, visitnsw.com, BWM, and numerous more. He has actually worked in numerous industries including alcohol, FMCG, tourist, telecoms, retail services, home entertainment, automobile, and sport, amongst numerous others. He has also won distinguished awards consisting of Gold & Bronze Cannes Lions, London International, D & AD, One Show, and New York Festivals.
Dean is readily setup to be assigned freelance jobs from Australia clients, and international assignments with ease. Thanks duly to Dropbox and the world wide web, he is able to work remotely and supply his same standard of quality and accuracy, as if he were just in the next studio, in the next room.
Dean’s storyboards can be created in different styles such as quick line standard, graphic pencil, line and a splash of colour, or exactly what he calls line and the entire caboodle.
So now you understand why you should have a storyboard created and why you should utilize a freelance storyboard artist in order to get the finest results. You can contact Dean at +61-432564690 or email him at scenesbydean@gmail.com.
Wheel woolies are microfiber brushes for cleaning deep inside wheels and rims with the help of your power drill. Polished concrete is strong, durable and low maintenance while having that earthy texture of stone with a polish equal to granite. Here is how it is done. Before you start buffing, care has to be taken that impregnated stones or foreign materials that could cause potential damage to the tire buffing machine needs to be removed by the operator. Detailing brushes use to remove fragments in your car before the detailing process happens.
It is similar to traditional polished terrazzo which is very flat and poured as a special mix to make the finish more successful. Polished concrete floors can also look almost bumpy and have little or no aggregate showing. Flatness and polishing are not necessarily the same thing which is a good point to clear up before agreeing to your project.
It costs extra time and diamond wear to cut floors with a concrete grinder until they are flat. They can either be ground flat to fully expose the aggregate like terrazzo, or the aggregate can be partially exposed, or the concrete grinding can expose no more than the fine sands at the surface. It often takes skill and experience to control the process of polished concrete floors and the quality of the concreter’s original laying work is also a contributing factor in the quality of the finish. Where the aggregate is a feature special materials can be added to the wet concrete mix such as coloured pebbles, metals and glass to enhance the final appearance.
Most people are unaware that there are ten to fifteen steps for polished concrete floors which takes a long time to complete and can be quite expensive.
Typically it takes many grinding passes to finish a highly polished floor although there are other ways as explained later. The general rule is to double the diamond grit size under the concrete grinder for each pass so a contractor might start with very coarse, 16 or 32 grit size diamonds, then use 60 grit diamonds followed by 120, then start again with a 50 grit diamond resin pad instead of a metal segment. Using the resin pads the steps may be 100, then 200, 400, 800, 1500 and finally 3000 grit. That would be ten separate grinding passes which does not count the two other essential steps.
Two more essential steps:
1. Hardening the surface
Polished concrete floors usually have the surface hardened with a chemical before the second, third or fourth grinding pass. The chemical soaks into the floor to a few millimeters (up to half an inch) and causes a chemical reaction to take place that makes the floor harder and easier to polish to a high finish. These floors are very strong and durable without having a surface coating.
2. Filling holes
After the first concrete grinder pass removes the top layer of concrete paste it will expose millions of tiny air holes. If these are not filled before the hardening process then the final polished concrete floor will show these unsightly imperfections. The holes are usually filled with an acrylic tile adhesive type of product mixed with either the grinding dust or cement powder which is hand scraped across the floor using a trowel. The preferred way to fill the holes is to spray the acrylic adhesive ahead of the grinder so that the diamonds mix it into the holes with the grinding dust on the third or fourth pass at around 120 grit. This method is faster and the dust matches the colour of the floor to hide the holes better than when using cement powder.
Very flat or slightly bumpy polished?
Some floor grinder machines are designed to produce a very flat floor by cutting off the high spots while some others are designed to follow the contours of the floor more. If the surface is to be polished without necessarily exposing the aggregate then only the finer resin pads need to be used on a concrete grinder that allows for movement of the pads so they can follow the contours of the surface. This will result in a polished floor without showing the pattern and texture of the exposed aggregates within the concrete which is faster and less expensive. Hardening can still be an advantage to help the durability of the surface and to produce a final gloss.
Problems with exposed aggregate
Sometimes the finish of exposed aggregate can be uneven if the mix of concrete was poured unevenly or finished off poorly. Boot marks or kneeling board marks can appear suddenly because they have pushed the aggregate down further which might require grinding down another two or three millimeters (quarter of an inch) which will cost more than was quoted. Grinding this far may not be what the customer wanted either so it can be a risk.
Single head or multiple head machines
Original terrazzo grinding was done with single head floor grinders until the production of three-head planetary machines. Planetary means that each head turns one direction while the turntable that houses the heads turns independently in either the same direction or the opposite direction. Some grinders can vary the direction of both the turntable and the heads and some can vary the speed of each. There are also multiple head planetary machines with four or more heads.
The planetary heads can follow the contours better than single or twin head grinders and are faster to use with less effort due to eliminating the requirement to physically move the grinder from side to side or in a circular motion. Single head terrazzo grinders should be moved in a circular motion to avoid grinding lips or shoulders.
Edging
As with wood floors the edges must be finished separately to the main floor area because the large machines may bump and damage the walls if they are used too close. For the first grinding passes a nine inch angle grinder is used having a diamond wheel attached with a dust extraction shroud fitted to remove the dust. The sit-down-to-use edge grinders are more controllable than stand up grinders while kneel-to-use grinders have good control, but are exhausting.
After the first two or three cuts a different dust extraction shroud with a corner feature is used with a seven inch polisher or a five inch, multi speed grinder to polish with resin pads and get tight into the corners.
Simple polished concrete floors “look”
The number of processes for polishing concrete can be reduced by up to 60% and still achieve a similar appearance by grinding and then coating with a clear sealer. The first step is to grind with 30/40 grit diamonds to expose the aggregate, then fill all the small air holes as described above (in 10 to 15 steps….) before a second grind with 60/80 grit or 80/100 grit diamonds.
This will produce a smooth enough surface to coat with a sealer. Polyurethanes are very hard sealers with a high gloss and can be purchased as UV stable to stop yellowing (usually double the price of non UV stable urethanes), clear epoxy sealers are not as smooth and will chalk and deteriorate if exposed to sunlight and acrylic sealers have a much shorter lifespan due to their poor resistance to wear. Two coats are necessary to provide a high gloss level.
Different ways to achieve “polished concrete”
The first is to cut the floor with coarse diamonds until all the high spots have been removed to produce a flat floor and then use all of the 12 to 15 steps to eventually polish it or as it is sometimes called, hone it. This is the true polishing system.
A variation of the above is to cut perhaps half of the height of the higher peaks by starting with a medium coarse diamond grit and proceed through to polishing using a machine that can ride up and over small rises.
A third alternative way of producing a honed surface is to start with relatively fine diamonds and simply polish to top of the surface after hardening without removing much of the top cement paste. It is easier to do this when the floor has been laid flat and smooth.
Lastly, a “polished look” can be obtained by grinding with coarse diamonds and then fine diamonds before coating over with a clear sealer.
Only truly polished floors will retain their gloss with little maintenance because all coatings scratch with wear and lose their high shine. Special buffing pads on a standard floor polisher that contain very fine diamonds can be used to maintain cleanliness and the high gloss levels of true polished concrete. Janitors can be provided with these and keep the floors in great condition without special treatment.
Some hire companies provide the grinding equipment for do-it-yourself concrete polishing and have all the pads for the purpose. This may not be so economical though because the pads may be only half worn when you finish depending on the area involved.
Ron Black has worked in the polished concrete industry with experience in both grinding and machines. He is part of Situp Products’ team and has written many pages of information for the concrete grinding website [http://www.situp.com.au] Find out the new process in polishing your car.